PIV (Positive Input Ventilation) general steps of installation
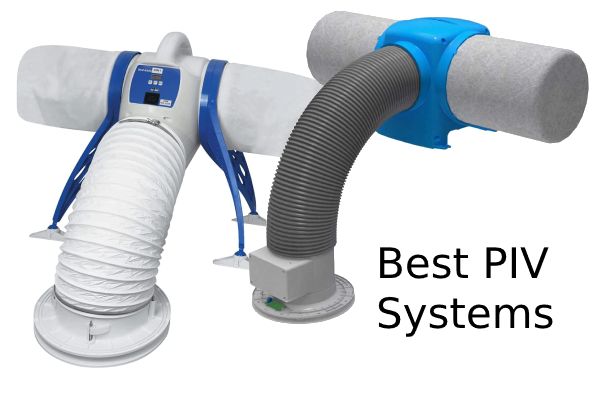
PIV (Positive Input Ventilation) is a type of whole-house ventilation system that uses a fan to draw fresh air into a building and distribute it throughout the house. PIV units are often used in homes to improve indoor air quality and reduce problems with condensation and dampness.
Installing a PIV unit typically involves the following steps:
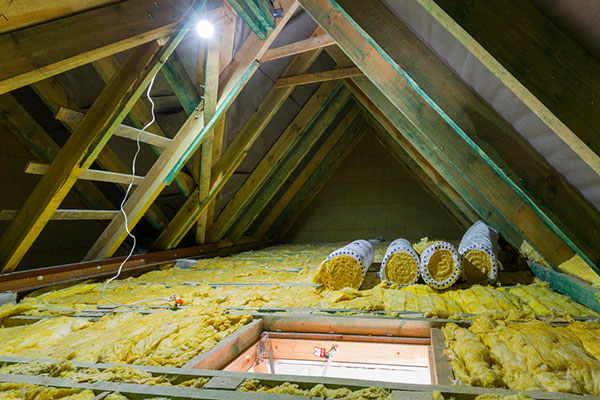
- Choose the location: The PIV unit is usually installed in the loft, where it can draw in fresh air from outside and distribute it throughout the house. The unit should be located close to an electrical outlet and away from any sources of heat or moisture. Make sure your loft is well ventilated and there are no condensation problems.
- Prepare the installation site: The loft should be clean and free of debris. Ensure there is sufficient ventilation in the loft area. Good ventilation is important for the efficient operation of the PIV unit, as it allows the unit to draw in fresh air from outside and distribute it throughout the house. Ensure the loft insulation is in good condition and not blocking the air path.
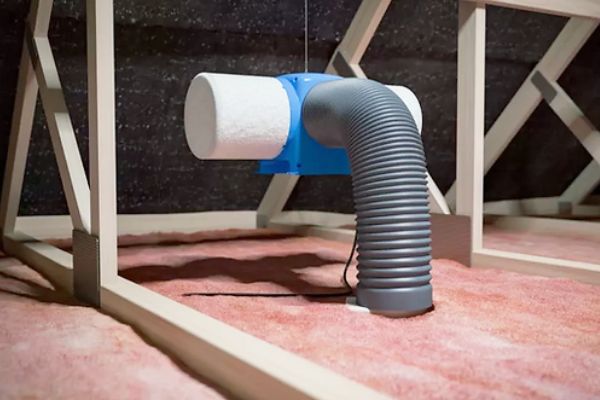
- Install the unit: Follow the manufacturer’s instructions to mount the PIV unit in the chosen location. Typically, this involves securing the unit to the rafters or ceiling joists in the loft and running a duct from the unit to the ceiling or wall of the main living space. You will have to drill a large hole so make sure you are certain about the unit location.
- Connect the electrical wiring: The PIV unit will need to be connected to a power source. This can be done by running a cable from the unit to an electrical outlet or by wiring the unit directly into the electrical system (for example light circuit). You may have to add fused switch for extra safety.
- Test the unit: Once the installation is complete, turn on the PIV unit and make sure it is functioning properly. Check the airflow in the main living space to ensure that fresh air is being distributed evenly throughout the house.
It is important to follow the manufacturer’s instructions carefully when installing a PIV unit. If you are unsure about any aspect of the installation, consult a qualified electrician or HVAC technician.
PIV unit installation videos
Who can install a PIV unit?
A PIV (Positive Input Ventilation) unit can be installed by a qualified electrician or an experienced HVAC technician who has the necessary knowledge, skills, and tools to carry out the installation safely and correctly.
It is important to ensure that the installer has experience with PIV units and is familiar with the manufacturer’s instructions and installation requirements. The installer should also be able to advise on the best location for the unit and on any additional ventilation measures that may be required to ensure adequate air flow and to prevent condensation and dampness.
In some cases, the installation of a PIV unit may require the installation of additional electrical circuits or ductwork, which will need to be done by a qualified electrician or HVAC technician. It is important to choose an installer who is licensed, insured, and has a good reputation in the industry to ensure that the installation is carried out safely and to a high standard.
PIV unit installation cost
The cost of installing a PIV (Positive Input Ventilation) unit in the UK will depend on a variety of factors, including the size and complexity of the installation, the type of unit being installed, and the location of the installation.
On average, the cost of installing a PIV unit in the UK can range from £500 to £1,500, including the cost of the unit and installation fees. However, the cost may be higher or lower depending on the specific circumstances of the installation.
Can I install PIV myself?
It is possible to install a PIV (Positive Input Ventilation) unit yourself if you have experience with electrical and HVAC systems, and you are confident in your abilities. However, it is important to note that improper installation can lead to poor performance, increased energy consumption, and potentially dangerous conditions.
PIV units usually require a dedicated electrical FCU switch, and the installation should be done in accordance with the manufacturer’s instructions and any local building codes. Additionally, the unit should be properly sized and located to ensure adequate air flow and to prevent condensation and dampness.
If you decide to install a PIV unit yourself, you should make sure you have the necessary tools and equipment, as well as a good understanding of electrical and HVAC systems. It may be helpful to consult with an experienced installer or to review online tutorials and videos to ensure that you are following the correct procedures.
If you are unsure about any aspect of the installation or you encounter any issues during the process, it is important to stop and seek the assistance of a qualified electrician or HVAC technician to avoid any potential risks or damages.
How to wire a PIV unit?
In the UK, wiring a PIV (Positive Input Ventilation) unit follows the same basic principles as wiring one anywhere else, but there are some specific regulations that must be followed to ensure safety and compliance. Here are the steps to wire a PIV unit in the UK:
- Turn off the power supply to the area where you will be working. This will help to prevent any electrical accidents.
- Identify the location where you will be installing the PIV unit. Ensure that it is close to an electrical socket and that it is suitable for use in the UK (i.e., it meets UK standards and regulations).
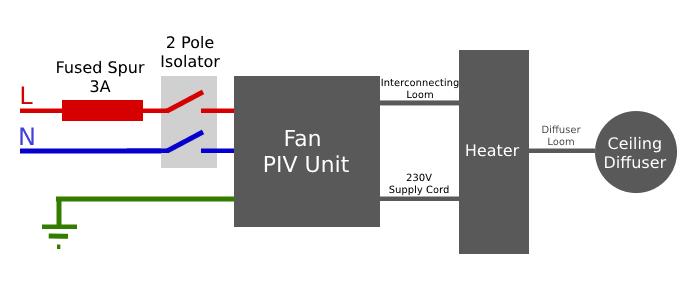
- Install a fused spur close to the PIV unit. This will provide an electrical supply to the unit and ensure that it is protected by a fuse. The fused spur should be installed by a qualified electrician, who will ensure that it is wired correctly and meets all UK regulations.
- Connect the wiring from the fused spur to the PIV unit. The wiring should be connected to the input terminals on the unit. Ensure that the connections are secure and that the wires are not loose.
- Turn on the power supply and test the PIV unit. Ensure that it is working correctly and that there are no electrical faults.
- Once you have tested the PIV unit, install any covers or casings that are required to protect the wiring and ensure that the unit is secure.
In addition to these steps, there are specific regulations that must be followed when wiring a PIV unit in the UK. These regulations are set out in the Wiring Regulations (BS 7671), which are published by the Institution of Engineering and Technology (IET). The regulations cover issues such as earthing, cable sizing, and electrical protection, and they must be followed to ensure that the installation is safe and compliant.
Conclusion
Installing a PIV (Positive Input Ventilation) unit can be a relatively straightforward process, provided that the installer has the necessary skills, experience, and tools. However, it is important to follow the manufacturer’s instructions carefully and to ensure that the unit is installed correctly to ensure optimal performance and to prevent any potential risks or damages.